Search Results:
使用 graphviz 生成 UML 图形
posted on 08 Aug 2018 under category tutorial
原文: https://ncona.com/2020/06/create-diagrams-with-code-using-graphviz/
程序员都喜欢操纵文本, 即使是为了生成一个流程图, 操纵文本也比拿鼠标拖拖拽拽的灵活 快速. 有什么办法能让你使用自己喜欢的编辑器来生成各种图形呢. 我用过的有两个工具: plantUML 和 graphviz.
这篇文章介绍一下 graphviz.
安装
- 如果在 Mac 上, 可以运行
brew install graphviz安装 - Linux 可以使用 apt:
sudo apt install graphviz - 其他平台可参见官方文档: https://www.graphviz.org/
安装之后便可以使用 dot 命令从代码生成图形图片: dot -Tpng input.gv -o output.png.
上面这条命令从 input.gv 生成 output.png 图片. graphviz 代码文件一般用 .gv 后缀. -Tpng 指示 dot 生成 png 格式图片.
可选: SublimeText 配置
如果你使用 SublimeText, 可以新增一套 build 系统. 这样一来便可以直接在 SublimeText 中, 通过快捷键直接生成并预览图片了:
-
新建一个文件, 内容如下:
{ "shell_cmd": "dot -Tpng $file -o $file_base_name.png && subl $file_base_name.png", "file_regex": ".gv$", } -
保存为 SublimeText 用户包里的
graphviz.sublime-build即可
基本用法
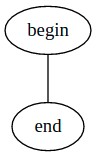
一个简单的图形定义如下:
graph MyGraph {
  begin -- end
}
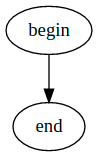
如果需要带箭头, 得使用 digraph
digraph MyGraph {
  begin -> end
}
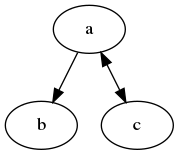
箭头可以是单向, 也可以是双向的:
digraph MyGraph {
  a -> b
  a -> c [dir=both]
}
形状 (Shape)
不喜欢椭圆, 可以换其他的:
digraph MyGraph {
  a [shape=box]
  b [shape=polygon,sides=6]
  c [shape=triangle]
  d [shape=invtriangle]
  e [shape=polygon,sides=4,skew=.5]
  f [shape=polygon,sides=4,distortion=.5]
  g [shape=diamond]
  h [shape=Mdiamond]
  i [shape=Msquare]
  a -> b
  a -> c
  a -> d
  a -> e
  a -> f
  a -> g
  a -> h
  a -> i
}

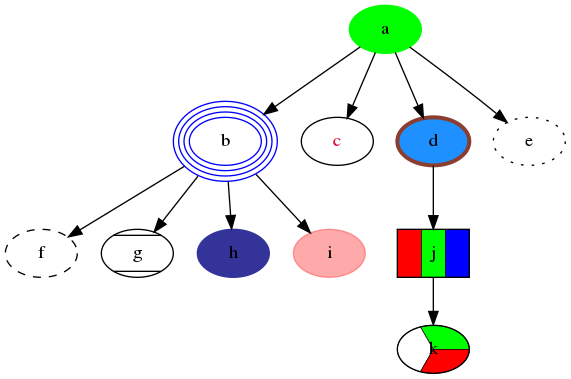
也可以给节点添加颜色和样式:
digraph MyGraph {
  a [style=filled,color=green]
  b [peripheries=4,color=blue]
  c [fontcolor=crimson]
  d [style=filled,fillcolor=dodgerblue,color=coral4,penwidth=3]
  e [style=dotted]
  f [style=dashed]
  g [style=diagonals]
  h [style=filled,color="#333399"]
  i [style=filled,color="#ff000055"]
  j [shape=box,style=striped,fillcolor="red:green:blue"]
  k [style=wedged,fillcolor="green:white:red"]
  a -> b
  a -> c
  a -> d
  a -> e
  b -> f
  b -> g
  b -> h
  b -> i
  d -> j
  j -> k
}
箭头 (Arrow)
可以修改箭头的头部和尾部:
digraph MyGraph {
  a -> b [dir=both,arrowhead=open,arrowtail=inv]
  a -> c [dir=both,arrowhead=dot,arrowtail=invdot]
  a -> d [dir=both,arrowhead=odot,arrowtail=invodot]
  a -> e [dir=both,arrowhead=tee,arrowtail=empty]
  a -> f [dir=both,arrowhead=halfopen,arrowtail=crow]
  a -> g [dir=both,arrowhead=diamond,arrowtail=box]
}

以及给箭头线添加样式:
digraph MyGraph {
  a -> b [color="black:red:blue"]
  a -> c [color="black:red;0.5:blue"]
  a -> d [dir=none,color="green:red:blue"]
  a -> e [dir=none,color="green:red;.3:blue"]
  a -> f [dir=none,color="orange"]
  d -> g [arrowsize=2.5]
  d -> h [style=dashed]
  d -> i [style=dotted]
  d -> j [penwidth=5]
}
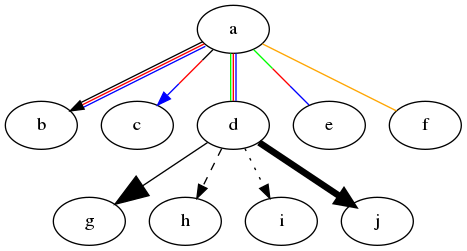
注意上面的代码中, 指定了多个颜色则会生成多条线. 如果想只为一条线指定多个颜色, 则 必须为其中至少一个颜色指定权重比, 如第四行的:
a -> e [dir=none,color="green:red;.3:blue"]
标签 (Label)
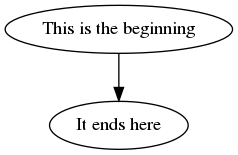
可以为节点添加标签:
digraph MyGraph {
  begin [label="This is the beginning"]
  end [label="It ends here"]
  begin -> end
}
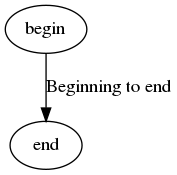
也可以为顶点添加标签:
digraph MyGraph {
  begin
  end
  begin -> end [label="Beginning to end"]
}
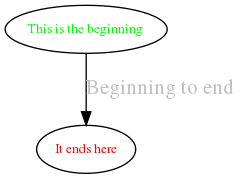
可以为标签添加样式:
digraph MyGraph {
  begin [label="This is the beginning",fontcolor=green,fontsize=10]
  end [label="It ends here",fontcolor=red,fontsize=10]
  begin -> end [label="Beginning to end",fontcolor=gray,fontsize=16]
}
集群 (Cluster)
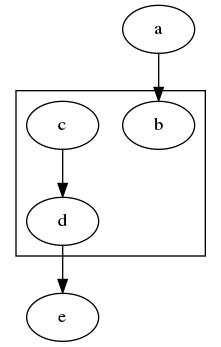
集群也叫子图. 子图的名称必须以 _cluster 开头, 否则它们不会被框住:
digraph MyGraph {
  subgraph cluster_a {
    b
    c -> d
  }
  a -> b
  d -> e
}
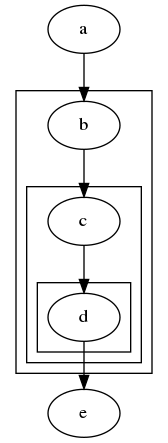
子图也可以嵌套:
digraph MyGraph {
  subgraph cluster_a {
    subgraph cluster_b {
      subgraph cluster_c {
        d
      }
      c -> d
    }
    b -> c
  }
  a -> b
  d -> e
}
HTML
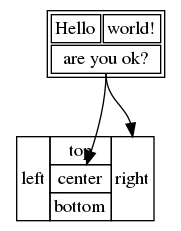
使用 HTML 可以创建更复杂的节点, 并且可以拆分每个节点成多个部分, 每个部分都能独立 的在图形中被引用:
digraph MyGraph {
    a [shape=plaintext,label=<
      <table>
        <tr>
          <td>Hello</td>
          <td>world!</td>
        </tr>
        <tr>
          <td colspan="2" port="a1">are you ok?</td>
        </tr>
      </table>
    >]
    b [shape=plaintext,label=<
      <table border="0" cellborder="1" cellspacing="0">
        <tr>
          <td rowspan="3">left</td>
          <td>top</td>
          <td rowspan="3" port="b2">right</td>
        </tr>
        <tr>
          <td port="b1">center</td>
        </tr>
        <tr>
          <td>bottom</td>
        </tr>
      </table>
    >]

    a:a1 -> b:b1
    a:a1 -> b:b2
}
注意:
- 只有一部分 HTML 可以用来创建节点
- 必须指定
shape=plaintext才能被正确渲染. - 指定的
port属性, 可以让我们后续使用a:a1引用特定某个单元格
可以为 HTML 节点添加样式:
digraph MyGraph {
    a [shape=plaintext,label=<
      <table>
        <tr>
          <td color="#ff0000" bgcolor="#008822"><font color="#55ff00">Hello</font></td>
          <td>world!</td>
        </tr>
        <tr>
          <td colspan="2" color="#00ff00" bgcolor="#ff0000">
            <font color="#ffffff">are you ok?</font>
          </td>
        </tr>
      </table>
    >]
}

图片 (Image)
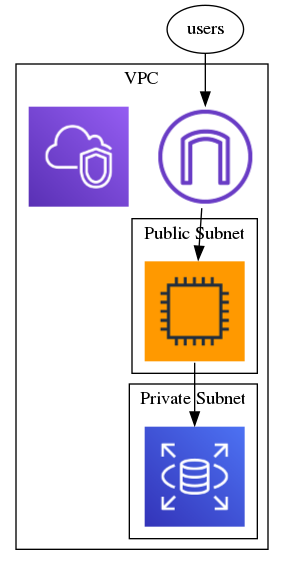
有时我们希望让某个节点显示为某个图标, 可以使用 image 属性指定:
digraph MyGraph {
  ec2 [shape=none,label="",image="icons/ec2.png"]
  igw [shape=none,label="",image="icons/igw.png"]
  rds [shape=none,label="",image="icons/rds.png"]
  vpc [shape=none,label="",image="icons/vpc.png"]

  subgraph cluster_vpc {
    label="VPC"

    subgraph cluster_public_subnet {
      label="Public Subnet"
      ec2
    }

    subgraph cluster_private_subnet {
      label="Private Subnet"
      ec2 -> rds
    }

    vpc
    igw -> ec2
  }

  users -> igw
}
等级 (Rank)
Rank 会改变渲染引擎的工作方式.
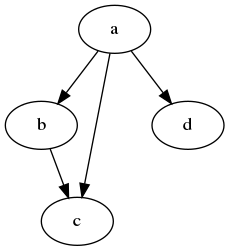
一般来说, 图形都是从上到下渲染:
digraph MyGraph {
  a -> b
  b -> c
  a -> d
  a -> c
}
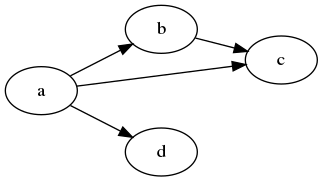
使用 rankdir 属性, 可以改成从左到右渲染:
digraph MyGraph {
  rankdir=LR

  a -> b
  b -> c
  a -> d
  a -> c
}
Rank 还可以用来强制一个节点跟另一个节点在同一层:
digraph MyGraph {
  rankdir=LR

  a -> b
  b -> c
  a -> d
  a -> c

  {rank=same;c;b}
}
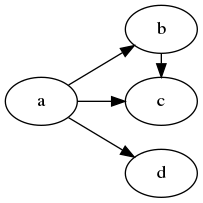
上例中, 使用了 rank=same 让 c 和 b 对齐
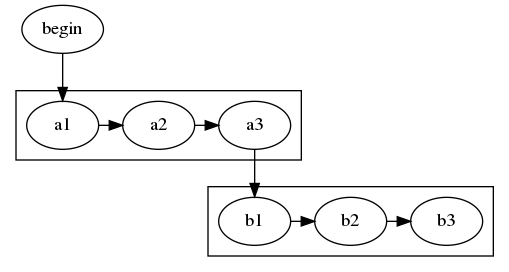
rankdir 属性是全局的, 所以不能在子图中改变它. 但是使用 rank 属性, 可以模拟一 个从左到右渲染的子图:
digraph MyGraph {
  subgraph cluster_A {
    a1 -> a2
    a2 -> a3

    {rank=same;a1;a2;a3}
  }

  subgraph cluster_B {
    a3 -> b1
    b1 -> b2
    b2 -> b3

    {rank=same;b1;b2;b3}
  }

  begin -> a1
}
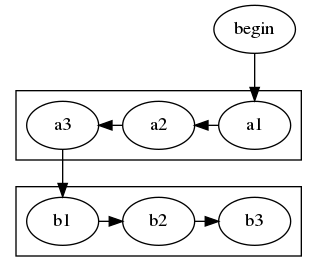
使用 rank 和 constraint=false, 可以创建更紧凑的图形:
digraph MyGraph {
  subgraph cluster_A {
    a1
    a2
    a3
    {rank=same;a1;a2;a3}
  }

  subgraph cluster_B {
    b1
    b2
    b3

    {rank=same;b1;b2;b3}
  }

  begin -> a1
  a1 -> a2 [constraint=false]
  a2 -> a3 [constraint=false]
  a3 -> b1
  b1 -> b2
  b2 -> b3
}
Rank 也可以用来指定每个节点之间的距离:
digraph MyGraph {
  rankdir=LR
  ranksep=1
  a -> b
  b -> c
  c -> d
}

默认的 ranksep 是 .5
结语
这篇文章只是简单介绍一下 graphviz 的我最常使用的用法和功能. 有关更多的诸如形状, 箭头语法, 可使用的颜色名, HTML 子集等, 可参见官方文档.
一些相关的工具:
- 在线可视化 graphviz 编辑器: http://magjac.com/graphviz-visual-editor/
- 另一个在线工具: http://www.webgraphviz.com
- 提供 graphviz 实时预览, 语法检测 SublimeText 包: https://packagecontrol.io/packages/Graphvizer